How to Remove (and Prevent) Scratches in Your Wire Wrapped Jewelry
By Elizabeth SchultzHave you ever finished a wire-wrapped piece, stepped back to admire your hard work... and then spotted scratches everywhere?
Maybe your pendant looks like it got mauled by a bear or maybe it's just not giving off that smooth, polished finish you imagined.
You’re not alone. And I promise you, this is something every wire artist runs into at some point. The good news? Those scratches are fixable. Even better? You can learn how to prevent them from happening in the first place.
Let’s break it all down.
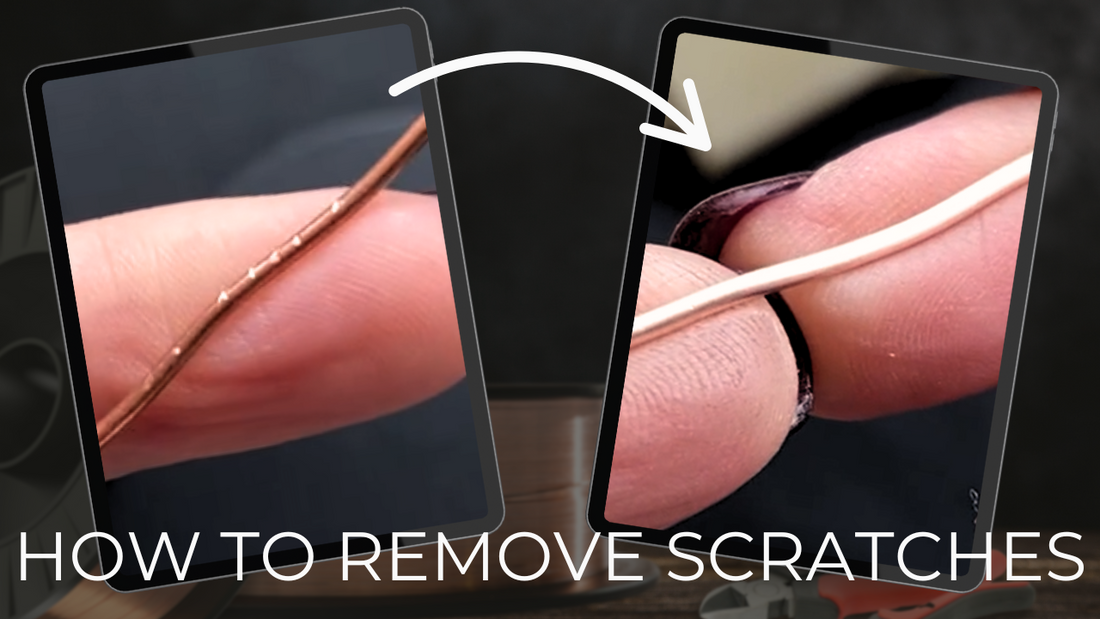
Step One: Fixing Scratches in Your Wire
Already scratched your piece? Don’t panic. Most surface scratches can be smoothed out with a few simple tools.
Start with sanding pads or sandpaper
Choose a grit between 600 and 1000 to begin softening those scratches. Then, work your way up to finer grits (I personally go all the way to 3000) to give the wire a nice polished look.
Want to work faster?
Try using a rotary tool with sanding heads. They do the same job, just quicker.
I’ve included a link to one I recommend here:
💡 Important note: This method works best on solid wires like copper, brass, or sterling silver. Not all wires can handle sanding (more on that in a bit).
Step Two: How to Prevent Scratches Before They Happen
This part starts with something simple: your pliers.
Those plier teeth? They're great for gripping and curling, but they can also leave deep dents and scratches. Especially if you’re still learning how much pressure to apply.
Here’s how to protect your wire:
Use Tool Magic or a rubber coating
This rubber coating softens the grip of your pliers. Just dip the jaws and let them dry.
Or try painter’s tape
Wrap a small piece around the jaws of your pliers. It’s a great quick fix—and it won’t leave sticky residue like duct tape or electrical tape will.
Upgrade to nylon jaw pliers
These are especially great for beginners or for working with delicate and coated wires. Some even come with replaceable nylon inserts—so your tools last longer, too!
What Wire Types Can (and Can’t) Be Sanded
Now, this is where you want to be a little extra careful.
Coated and plated wires – These have a super thin outer layer, sometimes just 1% of the total wire thickness. Even gentle sanding can strip it away, exposing the metal underneath. And that shiny, tarnish-resistant finish? It’ll vanish fast.
Filled wire – A little better! This has a much thicker layer of silver or gold, around 10%, so it can handle some light sanding. But even filled wire wears down over time, and silver-filled wire is becoming harder to find.
Solid wire – My top recommendation for beginners. Solid copper, brass, and sterling silver are forgiving, easy to polish, and more durable long-term.
Want Help Choosing the Right Wire?
If you’ve ever been unsure about which wire to buy or whether your wire can handle sanding, I’ve got something that’ll help.
I created a Wire Guide that explains everything in simple terms. It covers the pros and cons of each type, which ones are best for different projects, and where I get my wire (so you don’t have to guess at quality when ordering online).
📥 Click here to download the Wire Guide
Final Thoughts
Whether you’re sanding out scratches or preventing them in the first place, remember, this is all part of the journey. The more you work with wire, the more you’ll get a feel for how it behaves.
So be gentle with yourself (and your tools). You’re learning, growing, and making something beautiful.
If you have a tip for preventing wire scratches, I’d love to hear it in the comments below!
Happy weaving!
—Ellie
Please note that this article contains affiliate links which earn me a small commission when you make a purchase. This helps me to continue to create free content for you, so thank you!
