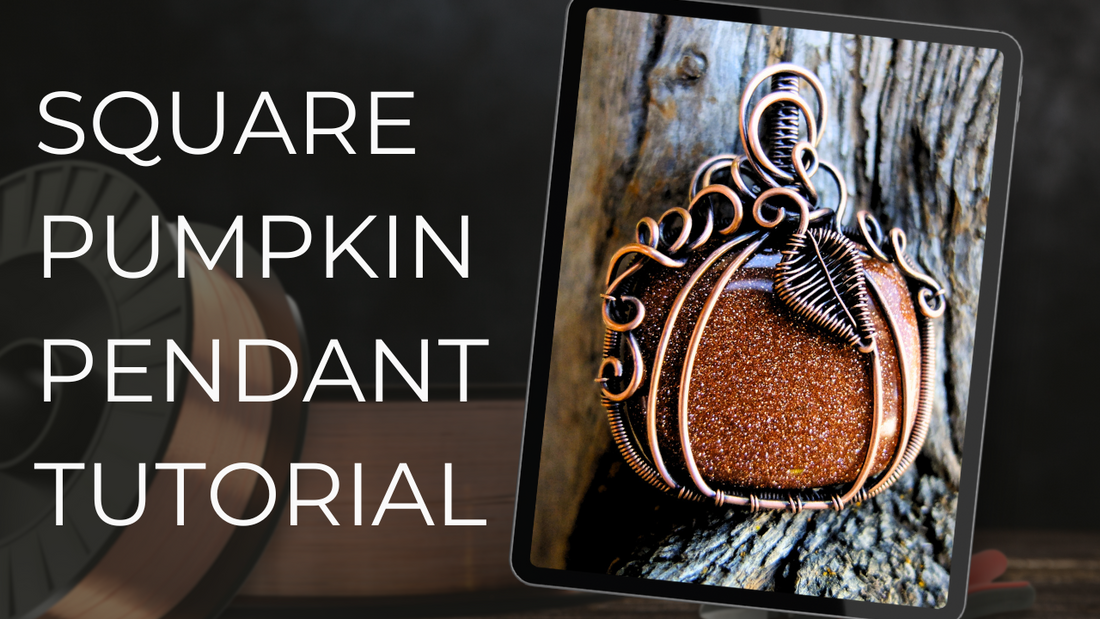
How to Make a Wire Wrapped Pumpkin Pendant with Square and Rectangle Stones!
By Elizabeth SchultzIf you’re looking for the perfect autumn jewelry project, or just want to make something fun and whimsical, this wire wrapped pumpkin pendant is a wonderful place to start.
In this step-by-step tutorial, I’ll walk you through how to create your own charming pumpkin pendant, from measuring your wire to adding a delicate leaf detail at the end. You can follow along with the video above for close-ups, or use this guide to reference each step as you go.
Tools & Materials You’ll Need
-
(x4) segments of 20 gauge wire (length depends on your stone—see Step 1)
-
About 5’ (1.5 m) of weaving wire
-
(x1) square or rectangle cabochon
-
Chain nose or flat nose pliers
-
Round nose pliers
-
Flush cutters
-
Ruler
-
Permanent marker
-
(Optional) Finger protector
-
(Optional) Bail-making pliers
Tip: You can play with different types of wire. Try square wire for a unique texture, or mix metals for a more rustic harvest feel.
Step-by-Step Instructions
1. Measure Your Wire
First, measure the distance around your stone, then add about 4–5 inches (12 cm) to give yourself extra room for shaping. Cut four equal segments of 20 gauge wire.
2. Mark the Center
Use a permanent marker to mark the center of each wire. This helps keep your weave even and your design balanced.
3. Start Weaving
Weave the center section of your wires together. This will form the base structure for your pumpkin.
4. Shape the Pumpkin
Bring up the two inner front wires to start creating that signature “pumpkin” curve.
5. Coil for Detail
Take the third wire and coil it on both sides until it meets at the top of your stone. This adds texture and helps frame the cabochon.
6. Create the Back Frame
Form the back of your stone’s setting, making sure it fits snugly and securely.
7. Wrap It All Together
Bind all your wires together at the top to prepare for weaving your bail.
8. Weave the Bail
Weave the bail in your preferred style, then wrap the wires around the bottom of the bail and the top of the stone for stability.
9. Add Pumpkin Details
This is where you can really have fun. Add swoops, curls, and tendrils to give your pumpkin personality.
10. Optional Leaf
Want to take it up a notch? Grab another piece of wire, weave a small leaf, and secure it to the bail.
11. Finish the Piece
(Optional) Oxidize your pendant for a rich, antique look, then polish it to bring out the highlights.
Casdans Stone Spotlight
For this project, I love using cabochons from Casdans. They carry gorgeous stones in all shapes and sizes, perfect for both square and rectangle settings. Their customer service is top-notch, and you’ll always know exactly what you’re getting.
Final Thoughts
Whether you’re making this pendant to celebrate fall, as a gift, or simply for your own jewelry collection, the end result is a charming, artisan piece you can be proud of.
If you give this pumpkin pendant a try, I’d love to see your creations! Share your experience in the comments or tag me on social media.
Until next time,
Happy weaving!
Ellie
Please note that this article contains affiliate links which earn me a small commission when you make a purchase. This helps me to continue to create free content for you, so thank you!
