DIY Wire Wrapped Spider Ring Tutorial (Perfect for Halloween Jewelry!)
By Elizabeth Schultz
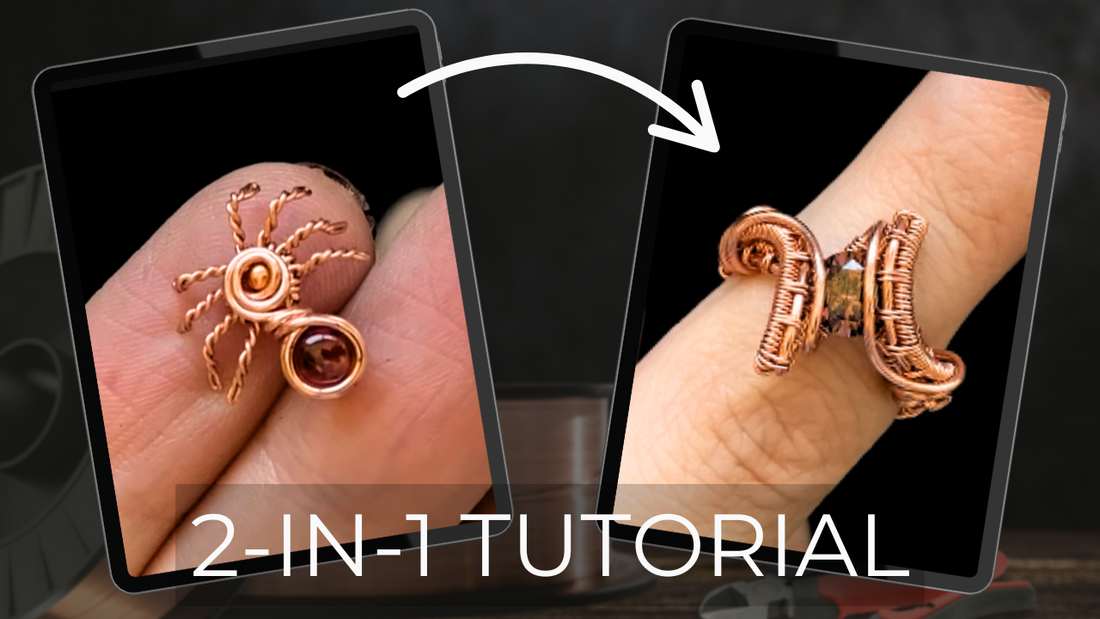
Have you ever wanted to make a piece of jewelry that’s both elegant and just a little spooky? In today’s tutorial, I’ll show you how to create a wire wrapped spider that you can add to pendants, rings, earrings or even combine with my wire wrapped spider web ring or pumpkin pendant tutorial from last year for the ultimate Halloween jewelry set!
The best part? This is really two tutorials in one. Not only will you learn how to make the spider itself, but I’ll also walk you through weaving a beautiful wire wrapped ring and then show you how to combine the two if you’d like to create a complete spider ring.
Whether you use beads, faceted stones, or cabochons, this project is a fun way to bring your creativity to life.
Tools & Materials You’ll Need
For the Spider:
-
(1) 4” piece of 22 gauge round wire (dead-soft)
-
8–10” of 26 gauge round wire (dead-soft) (length depends on how long you want the legs)
-
(1) 2mm bead (for the head)
-
(1) 4mm bead or cabochon (for the body)
For the Ring:
-
(3) segments of 20 gauge round wire (dead-soft), each the length of your ring band + 6”
-
About 5’ of 28 gauge round wire (dead-soft)
-
(1) 6mm round faceted stone or flat back cabochon (I get mine from Casdans!)
Tools:
-
Chain nose pliers
-
Round nose pliers
-
Flush cutters
-
Ruler
-
Sharpie or permanent marker
-
Ring mandrel
-
Tape or strip of paper
Step 1: Create the Spider
-
Cut your 22g and 26g wires.
-
Wrap the smaller wire around the larger to form the spider’s legs.
-
String the bead onto the 22g wire, then wrap the legs around it to form the spider’s body.
-
If you’re using a bead: string the 4mm bead behind the legs, wrap, and secure at the middle.
-
If you’re using a cabochon: create a spiral “seat” with your wire, then wrap around the stone in a spring setting.
Once secured, your little spider is ready! You can add it to pendants, earrings, or save it for your ring.
Step 2: Weave the Ring Band
-
Cut your 20g wires and mark where the ring band begins and ends.
-
Weave the band using your 28g weaving wire.
-
Separate the end wires into an “I” shape and bring them together around your ring mandrel.
-
Secure the band by weaving the wires together.
Step 3: Add the Stone
-
On both sides, weave 8 rotations of the lashing weave on two of the wires.
-
Set your faceted stone or cabochon in the center.
-
Secure with woven accents to lock the stone in place.
Step 4: Combine the Two
Finally, attach your finished wire wrapped spider to the ring. This turns it into a striking Halloween spider ring that’s sure to get noticed!
Wrap-Up
This wire wrapped spider ring is such a fun way to push your skills and create something festive, whether you wear it for Halloween or just because you love unique statement jewelry.
If you enjoyed this project, be sure to check out my full library of wire weaving tutorials for more designs, from beginner-friendly projects to advanced weaves.
And don’t forget, you can leave any questions in the comments, and I’m always happy to help.
Until next time, happy weaving!
Ellie
Please note that this article contains affiliate links which earn me a small commission when you make a purchase. This helps me to continue to create free content for you, so thank you!
